How to Fix Scratched Rims Without Going to a Repair Shop

Do annoying scratches on your beautiful rims bother you every time you take your wheels out for a spin? In this post, we will show you how to fix those pesky scratches without even stepping into a repair shop. That’s right—you can save time and money by doing it yourself. Whether you accidentally grazed a curb or had a close encounter with a pothole, we’ve got you covered with simple and effective techniques that will make your rims look as good as new in no time.
Identify the Extent of the Damage
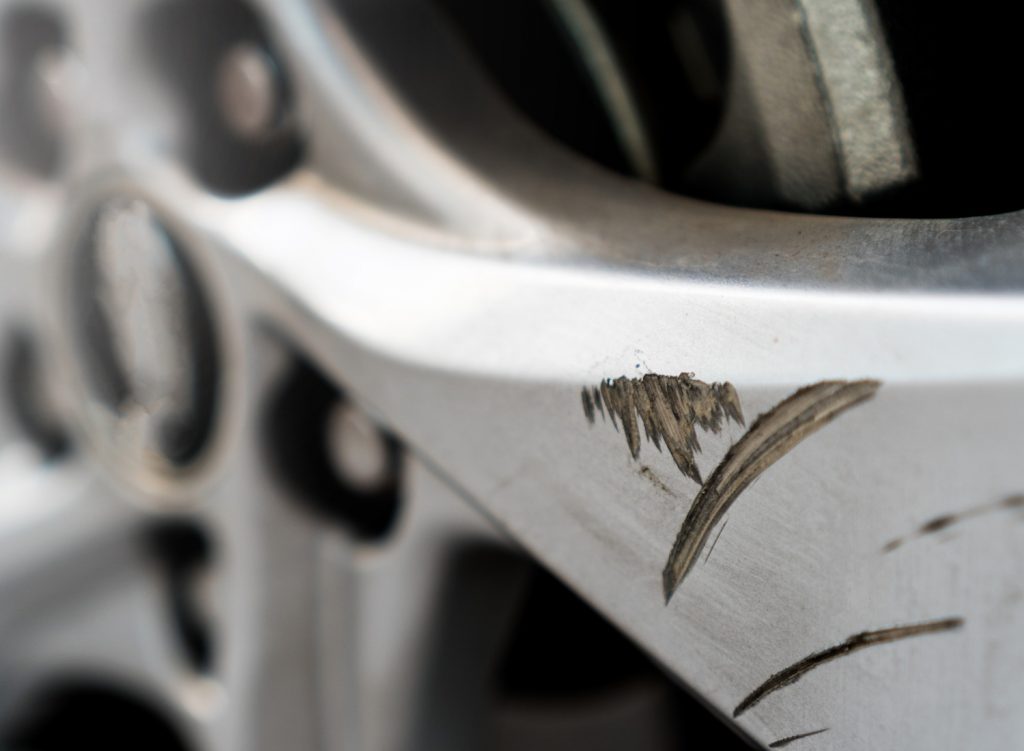
When it comes to scratched rims, it’s important to understand the different types of scratches that can occur. These include surface scratches, which are shallow and only affect the top layer of the rim, and deep scratches or gouges, which penetrate deeper into the metal. Before diving into the repair process, it’s essential to evaluate the severity of the damage. Minor scratches can often be fixed at home, while major scratches or extensive damage may require professional assistance.
Gather the Necessary Tools and Materials
You’ll need various tools to successfully repair scratched rims, including a torque wrench, sandpaper (in different grits), filler material, paint, a polishing compound, masking tape, and microfiber cloths. When tightening the lug nuts on your rims, use a torque wrench to ensure they are fastened evenly and at the correct tightness, preventing further damage.
When considering the choice of sandpaper grit, it depends on the severity of the scratches. Finer grits (around 800-1000) are suitable for surface scratches, while coarser grits (around 400-600) are needed for deep scratches and gouges. For filling and painting over scratches, choose a filler material that matches the color and finish of your rims. Automotive touch-up paints or rim-specific paint kits are available in various colors and finishes to ensure a seamless repair.
Prepare the Damaged Rim for Repairs
Before starting any repairs, clean the rim thoroughly to remove dirt, grime, and debris. Use a mild detergent, water solution, and a sponge or soft cloth to clean the surface. Once cleaned, ensure the rim is completely dry before proceeding. To protect the tire and surrounding areas from accidental damage during repair, apply masking tape around the scratched area. This will create a barrier and prevent any unwanted paint or filler from spreading.
Repair Minor Scratches
For minor scratches, use the appropriate grit sandpaper to sand down the affected area gently. Be careful not to sand too aggressively, as this can damage the rim further. Sand until the scratch becomes smooth and blends with the surrounding surface. Once sanded, apply a thin layer of filler material to the scratched area. Spread it evenly using a putty knife or similar tool. Allow the filler to dry completely according to the manufacturer’s instructions.
After the filler has dried, use fine-grit sandpaper to smooth rough edges. Then, apply a layer of automotive touch-up or rim-specific paint to match the color and finish of your rims. Allow the paint to dry thoroughly. Finally, use a polishing compound to buff the repaired area and blend it with the rest of the rim.
Fix Major Scratches
For deep scratches and gouges, the repair process is slightly different. Start by sanding the scratched area with coarse-grit sandpaper to remove loose metal or debris. Continue sanding with progressively finer grits of sandpaper until the surface is smooth. Consider using a filler material specifically designed for deeper scratches and gouges at this stage. Following the manufacturer’s instructions, apply the filler and allow it to dry completely.
Once the filler has dried, sand it with fine-grit sandpaper to achieve a smooth finish. Then, apply a touch-up or rim-specific paint to match the original color and finish. Allow the paint to dry thoroughly. Finally, use a polishing compound to buff the repaired area, ensuring it blends seamlessly with the rest of the rim.
Preventive Measures
To prevent future damage, please make it a habit to check your rims regularly. Look for any signs of scratches, dents, or other damage. Catching minor issues early can help prevent them from worsening over time. Adjusting your driving habits can also help protect your rims. Avoid curbs, potholes, and other obstacles that can cause scratches or dents.
Practice safe parking techniques to minimize the risk of accidental rim damage. Consider using rim protectors or guards to add an extra layer of protection. These accessories act as a cushion between the rim and potential sources of damage, such as curbs or debris on the road.
Conclusion
Fixing scratched rims without going to a repair shop is possible and a cost-effective and satisfying DIY project. Following the steps outlined in this article, you can effectively repair minor to moderate scratches and gouges on your rims, restoring their appearance and functionality. Remember to evaluate the extent of the damage, gather the necessary tools and materials, and prepare the damaged rim before starting the repair process. For minor scratches, sanding down the affected area, applying filler, and painting over the repair will suffice. However, additional steps such as sanding, filling, and painting are required for deep scratches and gouges.
