Winterizing Your Wheels
If you live in a climate with “real” winters and you need to winterize your collector car every fall, you might as well do it right. Here’s how.
At the risk of beating the proverbial dead horse, I am going to re-open the subject of how and why to winterize a car. In most parts of the country/world, winter means below freezing temperatures, and your car is not going to be used for several months. And, although we address this subject to some extent every year, perhaps those of you new to the hobby haven’t had the annual experience of pickling your car.
I’ve paid my dues. I lived the largest percentage of my years (I was going to write, “the better part of my life,” but that isn’t so, when quality of life is considered) in the Northeast. I’ve experienced hurricanes, blazing heat, unbearable humidity, freezing rain, blizzards, and all that other stuff that I don’t miss at all now. But while I lived there, Thanksgiving weekend — Thursday morning until the turkey was on the table, and then Friday through Sunday — was devoted to 1) raking up the rest of the fallen leaves, 2) winterizing the cars, and 3) winterizing the boat and getting it out of the water.
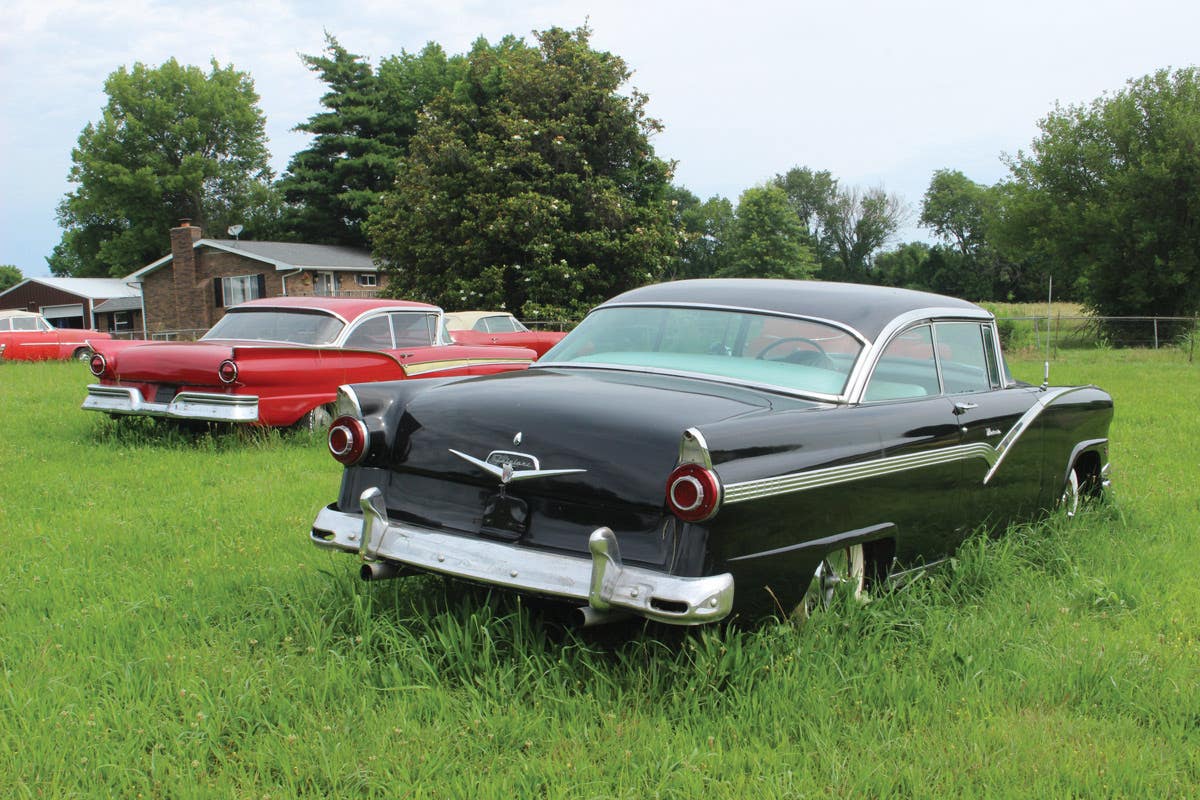
If you’re storing a 1957 Chevrolet or other collector car for the winter, you’ll need quality products to prep the vehicle. This assortment of cleaners, waxes and accessories will keep the car in good shape for the long winter’s nap.
Before the freezing weather hits, and before you turn off the garden hose for the season, wash the car, engine and under-carriage. That’s right, the under-carriage. Not just for beauty’s sake, but to get rid of the road crud, dripping oil, leaves, bugs and who knows what else might be caught in the frame, fender wells, above the transmission, and all those other places that you never see. If your state permits it, the easiest way to clean under the car is at a public do-it-yourself car wash.
Pick up a couple of cans of engine degreaser or a quart spray bottle of degreaser, such as Oil Eater. Wear safety goggles; those degreasers can play havoc with your eyes, and their mist seems to get everywhere. Make sure that you wear old clothes, and you may even want to bring a mat to kneel on. Get as far under the car as you can, and spray that degreaser into all of those spots that you normally can’t see: the top of the bell housing, the transmission and drive line, the rear end pumpkin and the back side of the wheels. Get them all. Sometimes even a long-handled scrub brush is helpful.
If you plan on doing the engine, too, make sure that you bring plastic bags and rubber bands to cover the distributor, carburetor, coil and anything else that you are afraid of getting wet. You may even want to throw one of the refillable tanks of compressed air and an air-gun, and a spare battery and jumper cables in the trunk just in case the ignition system still gets wet and the car won’t start.
After the degreaser has had a few minutes to do its work, start at the highest point and use the wand to rinse it all off. If you are doing the engine compartment, don’t forget to wash out the radiator, from the inside, to get all of the bugs and leaves out of the honeycomb.
Most of the commercial do-it-yourself car washes recycle the water. It doesn’t go back into the ground. If you do the same wash at home, the dirt, grease and emulsified oil will either stain the driveway or run into the street and back into the ground water.
Now go home and properly wash the body. Get rid of the slop that splashed onto the paint, the road tar that you picked up during the year and the bird and insect droppings that you meant to wash off but never got around to. Finish with a good polishing and waxing, do the brightwork, the nickel or chrome, and the job won’t have to be done again in the spring when all that you want to do is get in and drive.
Okay, next. How’s your antifreeze? If it hasn’t been changed in a year or so, do it now. If you’d like, add a can of cooling system cleaner, get the engine hot and drain the radiator and the block (often the block has its own drain plugs or petcocks, independent of the radiator. Drain both to ensure that all of the dirty water is removed.). Flush the block according to directions on the cleaner can, and then fill the system halfway with fresh water, add the recommended amount of antifreeze, start the engine and allow it to idle and top off the system. Again, run the engine until it is hot. This does two things: it mixes the water and antifreeze thoroughly and it pumps the clean mixture into all parts of the cooling system. Let the engine cool, and recheck the fluid level. Refill if necessary (and if you add water at this point, again, run it until hot to again mix the coolant). If you haven’t changed the antifreeze, check it with a hydrometer to be sure that it is able to withstand anticipated cold spells, and add a can of water pump lubricant.
Chances are that you are not going to drain the old gas. When the gas level is pretty low, add a can of gasoline antifreeze (it’s basically alcohol) which will absorb moisture in the gas tank, and add a can of Sta-Bil gas stabilizer so the stuff doesn’t sour and turn into varnish while the car is laid up for the winter. A good time to address the fuel system is before you start the antifreeze routine above. Why? Because you have to run the engine to do the cooling system, and running the engine will mix the gas line antifreeze, the Sta-Bil and the gas, and will run the mixture through the fuel pump, vacuum tank, carburetor etc. If the mixture does not get into the engine, it’s not going to do any good.
The engine oil should be changed prior to the antifreeze routine, for the same reasons. You’ll get the old, dirty oil (don’t forget the oil filter) out of the engine and refill it with clean fresh oil, and running it will distribute the fresh oil all over the internal engine parts prior to the long winter’s sleep.
There is only one thing left before you turn off the ignition for the winter. Drive the car into the storage area, leaving the tailpipe hanging out in the fresh air. And then, while the engine is still running, dribble Marvel Mystery Oil into the carburetor. You’ll have to play with the throttle linkage to keep the car from stalling, but, as you increase the amount of MMO, the engine will finally stall out. The gas has been over-balanced by the oil, and it cannot combust. But, you’ve gotten enough of the oil into the carb to coat its insides, and the valves and the combustion chambers are also oiled. If the car isn’t completely in the garage yet, a couple of friends can help push it in the last foot or two.
There’s still a lot of work to be done. Take out each spark plug and pour about 1/2 ounce of Marvel Mystery Oil into each cylinder. Do not replace the plugs. Throw a towel or rags over the open plug holes and just touch the starter (or better yet, crank it over by hand). Just one or two revolutions is all that’s needed to distribute the oil. Loosely replace the plugs and reattach the plug wires (so they don’t get mixed up).
Now this is important. Make a list of things to be done in the spring. Don’t trust to memory, especially if you’re my age. You’ll want to remove the plugs again when you are ready to start the engine, and crank it over to get the oil out of the cylinders. Then you’ll replace the plugs, torque them down and reattach the wires.
Pop off the distributor cap and give it a spritz of WD-40 (remember, the “WD” stands for “water displacement”). If moisture gets under the cap, it will help prevent problems.
While the cap is off, check and adjust the points. Replace them (and the condenser, distributor cap, coil, wires etc., if necessary) now so it’s one less thing to be done in the spring. Or, make a note on your list to change them later on.
If you have an oil-bath air filter, drain it, clean it out and replace the oil with fresh. Drain the windshield washer (you forgot that, didn’t you? What about that jug of water in the trunk for emergencies? Get rid of that now, too, or it will burst when it freezes.). Take the time now to check all of the wiring, fan belts, and take a careful look all around the engine. Since you washed the engine just recently, any oil leaks should be pretty evident. Put them on your “to do” list for the winter or spring. Order the gaskets that you need now, and don’t wait for the last minute when you are anxious to get the car on the road. Do the same thing with your wires.
One last thing before we take out the battery. Turn on all the lights and walk around the car looking for burned-out bulbs. Put them on your list. Make sure that you turn off all of the light switches and remove the battery. Set it aside for a moment, and clean the battery cables. A selection of small wire brushes and some emery cloth makes this job pretty easy. If there is evidence of that green/white corrosion crawling up the cable under the insulation, make a note to replace, not just clean, that cable. If you are ambitious, disconnect the grounded battery cable and polish the ground contact until it shines. Clean the cable end and the bolt, too. Reattach the cable, and you can paint the connection with Plasti Dip to prevent moisture from getting to it in the future. Check the battery cable at the starter motor, and clean that also. Spray the battery ends of the cables (after cleaning) with WD-40 to ward off moisture for the winter.
Now the battery. Before you do anything else with the battery, clean it thoroughly. First use a solution of baking soda and water to neutralize any acid on the top of the battery. Then use a household all-purpose spray like Fantastic or Formula 409 (or that same Oil Eater that you cleaned the engine with). Use a brush to get all of the oil and grease off the case, and rinse it thoroughly. Be sure not to get any cleaner or water in through the filler caps. When the battery is dry, check the fluid level under the caps. As long as the fluid level comes up to the split ring under the caps, you’re okay. It doesn’t have to be full-to-the-top. Matter of fact, it shouldn’t be. Put a slow charge on the battery. Use a charger with an automatic shut-off. If the gauge on the charger doesn’t drop to “zero” after a day or so, the battery is looking for replacement. Put it on your list. If it takes a full charge, set it aside in a warmed area (a fully charged battery probably won’t freeze, but why take a chance) off the concrete floor (no, the concrete does not suck the current out of the battery, but the cold of the floor migrates to the fluid). A couple of short lengths of 2x4 are all you need to keep it off the floor. Put a float charger on the battery to keep the charge up there. 12-volt float chargers are readily available; 6-volt units are more difficult.
There is still work to be done, but we’re getting there. My suggestion is to put the car up on jack stands and to remove the wheels/tires. There are three reasons for this. The first is that it takes the weight off the tires so that they don’t get a “set.” The second is so that you have an opportunity to carefully examine the tire for foreign objects that haven’t started a leak (yet), for splits, cracks, bad valves, tread wear and tread wear patterns, bubbles or eggs that might not be readily visible, or other problems with the tires. Again, if you need replacements, don’t wait until you’re ready to put the car back on the road. Store the tires in black plastic trash bags for the winter. And the third reason for their removal is to eliminate a very easy access for mice to get into the car. Sure, they can still climb a jack stand, but it’s more trouble. Tires make an easy path up to the engine compartment or to the trunk area. (For the same reason, don’t lean anything against the car while it’s in storage.)
Finally, the body itself. Moisture eliminator packs are very effective. Putting one in the trunk and one in the car’s interior will keep it from getting musty. When it comes to pests, I’ve heard all kinds of stories about different products to keep mice and other rodents out. Simple Green, moth balls, electrical rodent repellents, all kinds of stuff. Does it work? Who knows for sure. But it’s a good idea to stuff steel wool into any openings from the engine compartment to the passengers compartment. Same thing with holes into the trunk. Clean the interior of the car and the trunk thoroughly to get rid of any food that might have been left in from last summer’s picnic. Keep the hood of the car open so that light gets in. Mice don’t like light, so if there is light, they’ll move on to a dark spot.
Check the car regularly during the winter for evidence of mice. If they get in, you can get rid of them and then figure how they got in and rectify that problem. But find them before they cause too much damage. Do whatever you must to keep the room in which the car is stored rodent free.
Make sure that you make a note of whatever you’ve done that has to be undone in the spring. That includes removing mothballs, dishes of whatever stuff you might have put into the car, steel wool in holes, tape over holes — stuff like that.
Done! Nope, you’re not. Not quite, but you’re real close. Grab a pad and pencil, sit down on the running board, close your eyes and think. Did you have any problems last year while driving? Clutch chatter? Errant gauge readings, dim lights, hard starting, strange rattles, anything out of the ordinary? Write them down on your list. These are things for you to work on while the car is up on jack stands.
Come spring it will be nice to be able to put on the wheels, tighten the spark plugs, put in the battery and go. No wasted time then. You’ve done it all over the winter.
Editor’s note: This article is an excerpt from one that appeared in the November 2007 issue of Skinned Knuckles magazine. Skinned Knuckles is dedicated to the preservation of original cars and trucks and to the authentic restoration of vehicles from the brass era through the late 1960s.
Skinned Knuckles may be reached at 714-963-1558, by e-mail at skpublishing@yahoo.com and on line at www.skinnedknuckles.net. The address is P.O. Box 6983, Huntington Beach, CA 92615.